 AA Global
 Why Your Entries Fail: The Fair Value Gap Entry (Free Guide)
Key takeaways
- A break alone means nothing, price can wick or even close through a level and reverse
- Wait for displacement: a fair value gap through the level
- Then wait for the retest, and only enter if it holds
- Stop goes beyond the retest candle, target at least 2 to 1
- The waiting is the strategy, missed moves cost nothing
The one reason entries fail
You are entering on the break. This guide shows, frame by frame from the video, why the break is the trap and what to wait for instead.
Step 1: The setup everyone sees
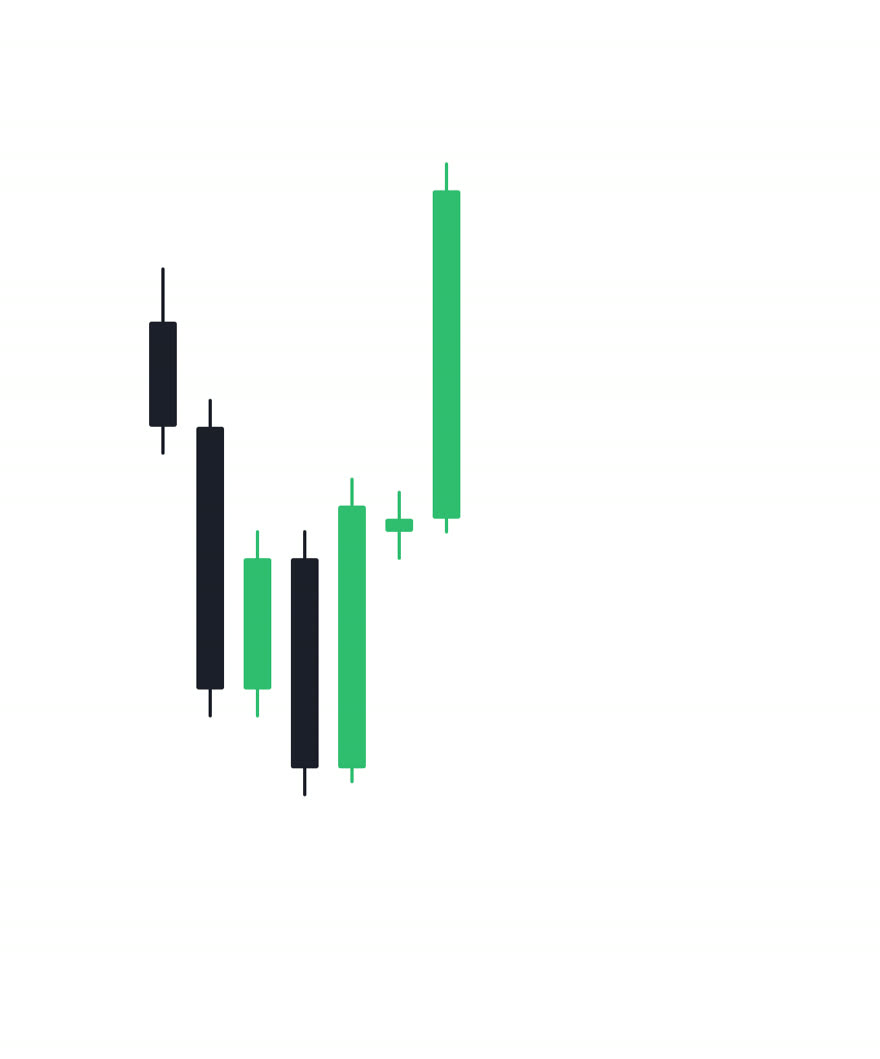
Price breaks a level and it looks like the move is leaving without you. That urgency is exactly what gets exploited.
Step 2: Why the break alone is a trap
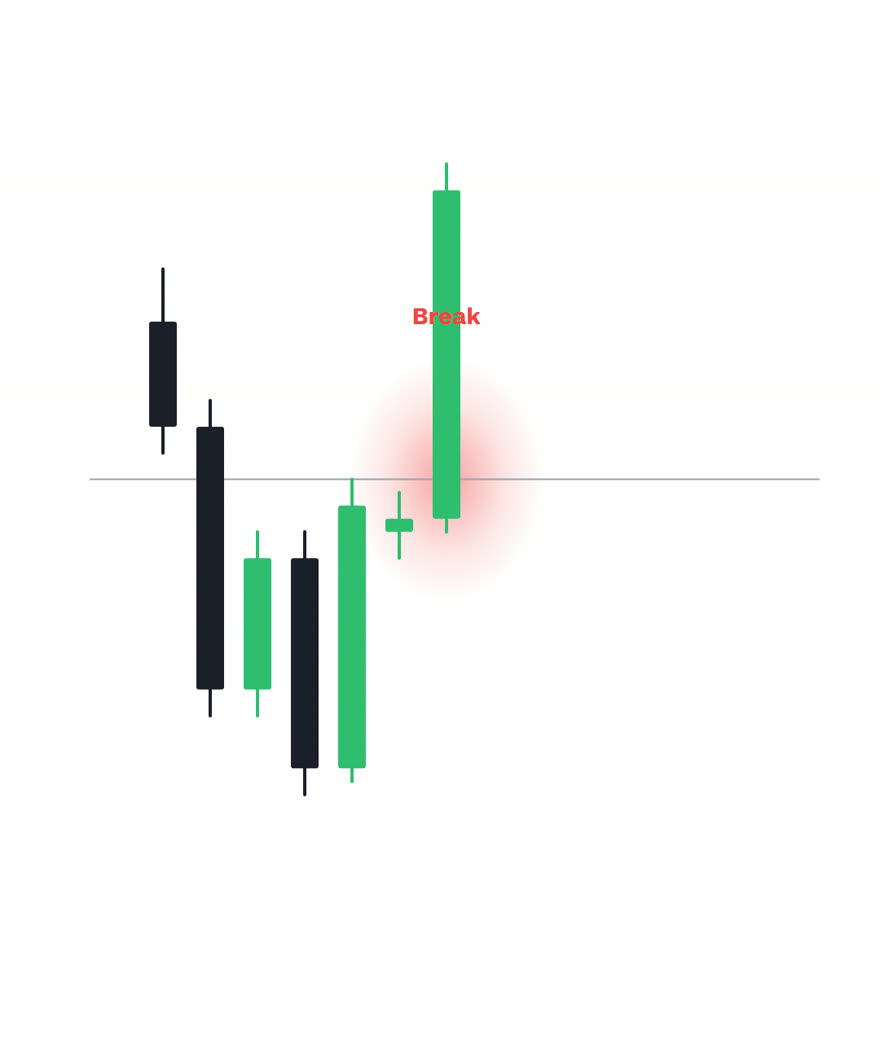
A break on its own means nothing. Price can wick through your level, it can even close through it, and still reverse straight back. Buying that break puts your stop exactly where the market goes hunting.
Step 3: Demand displacement
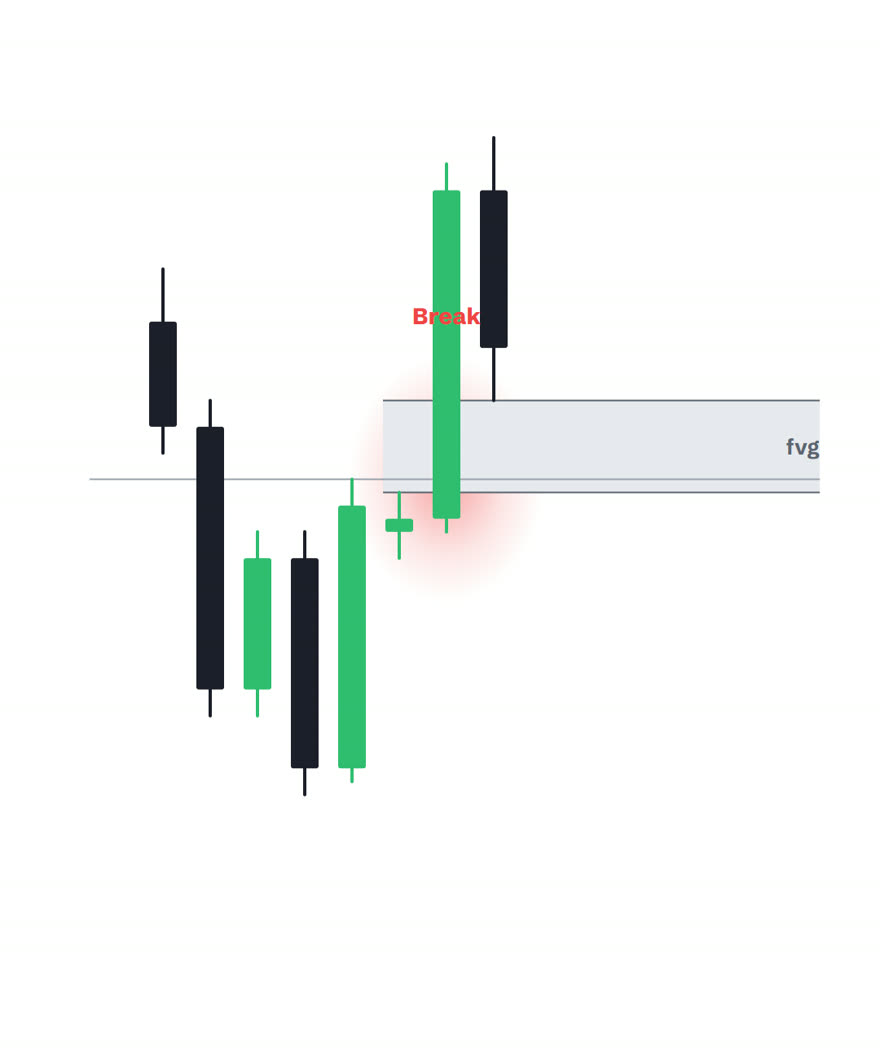
The fix is to demand evidence. Wait for displacement: a break so forceful it leaves a fair value gap, drawn here as the shaded zone running off the chart.
Step 4: Know the anatomy
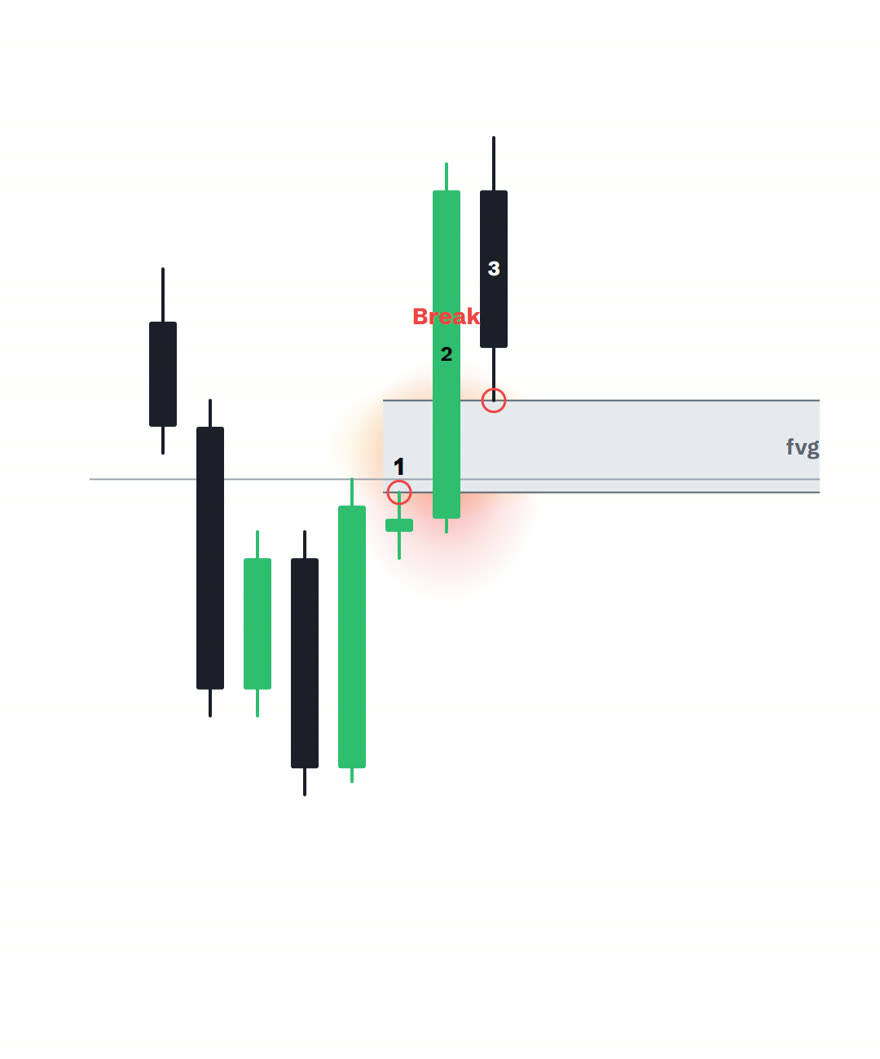
The fair value gap is a three candle pattern. Candle 2 moves with so much force that candle 1's wick and candle 3's wick never touch. That empty space tells you whether buyers or sellers are really in control, or whether it was just another fake out.
Step 5: Wait for the retest
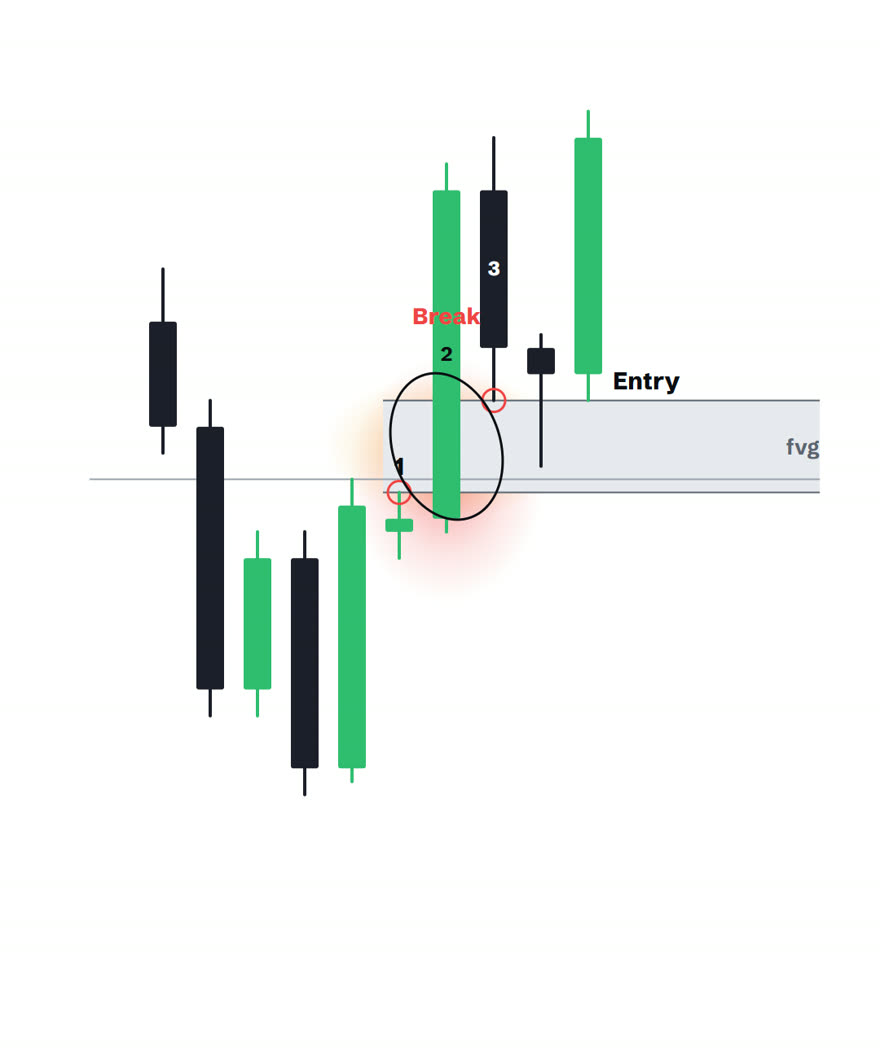
Once the gap prints, do nothing. Price pulls back to the level it just broke. If the retest holds, that is your confirmation and your entry. If it slices straight back through, the filter just saved you a loss.
Step 6: Fixed stop, fixed target
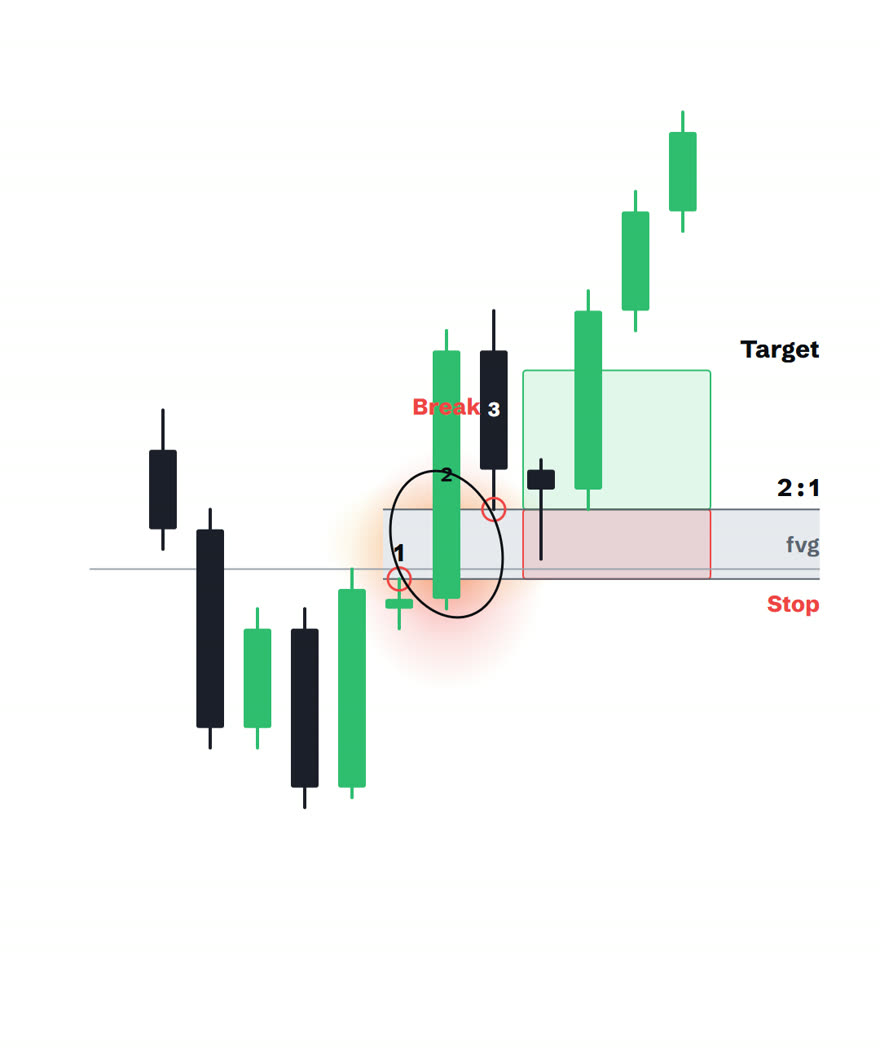
Stop goes beyond the retest candle. Target is a minimum of 2 to 1. Small defined risk, asymmetric reward, and no more donating your stop to false breakouts.
Before you trade it
Drill the retest entry on the free entry trainer, check every live setup against the pre-trade checklist, and build the foundations with the free beginner course if you need them. Then 20 demo trades before a cent of real money.
Try trading free, $10,000 virtual demo →Frequently asked questions
Why do breakout entries keep failing?
What is a fair value gap entry?
How do I identify a fair value gap?
What if price never retests the gap?
What risk to reward should I use on these entries?

Keep learning
New to trading entirely? Start with the free beginner course: 20 short lessons from zero to your first demo trade.